Optimize your mixing environment
By Airfix Music TeamApril 8, 2020
Home studios : Adjustments and compromises
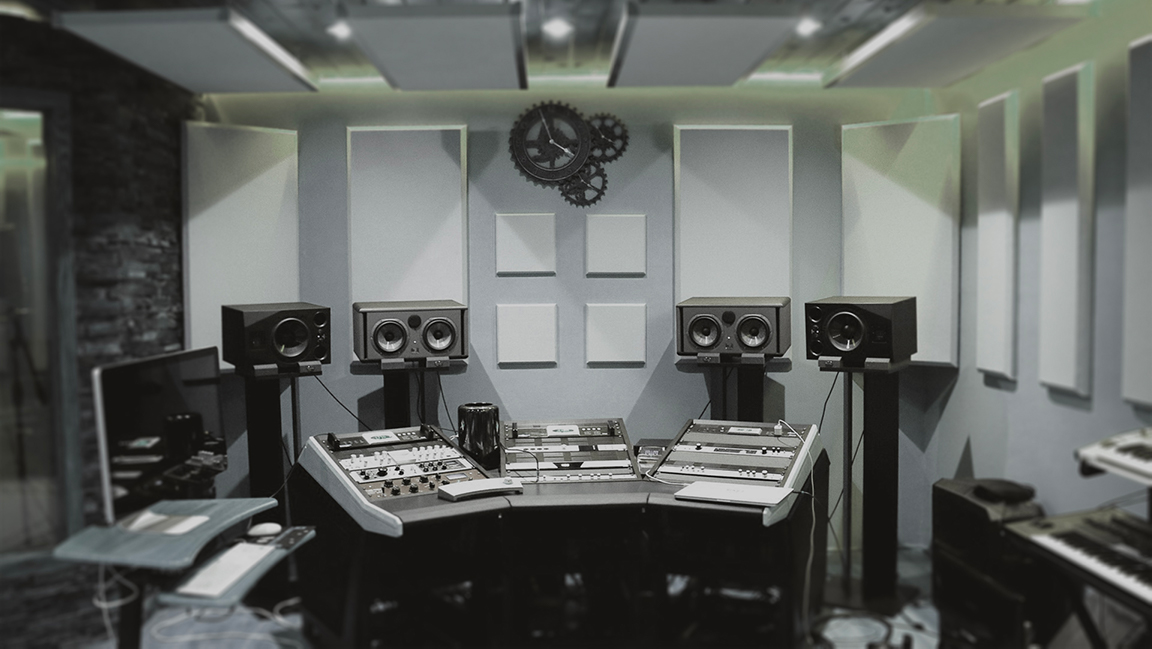
If you make your own mix at home, you sometimes have to be willing to make a few small compromises. Home studios are often set up in a square room made of drywall, in a bedroom, in the basement or in a loft-like open area.Those non-ideal installations always present the same problems : lack of space, poor acoustics, annoyingly-located windows or closets, poor soundproofing, too much reverb, etc. Unless you have designed your house plans with your studio plans in mind, your work environment more than likely isn't optimal for mixing. The question is : how can I maximize my installations and optimize my results at a low cost?
Optimizing your environment
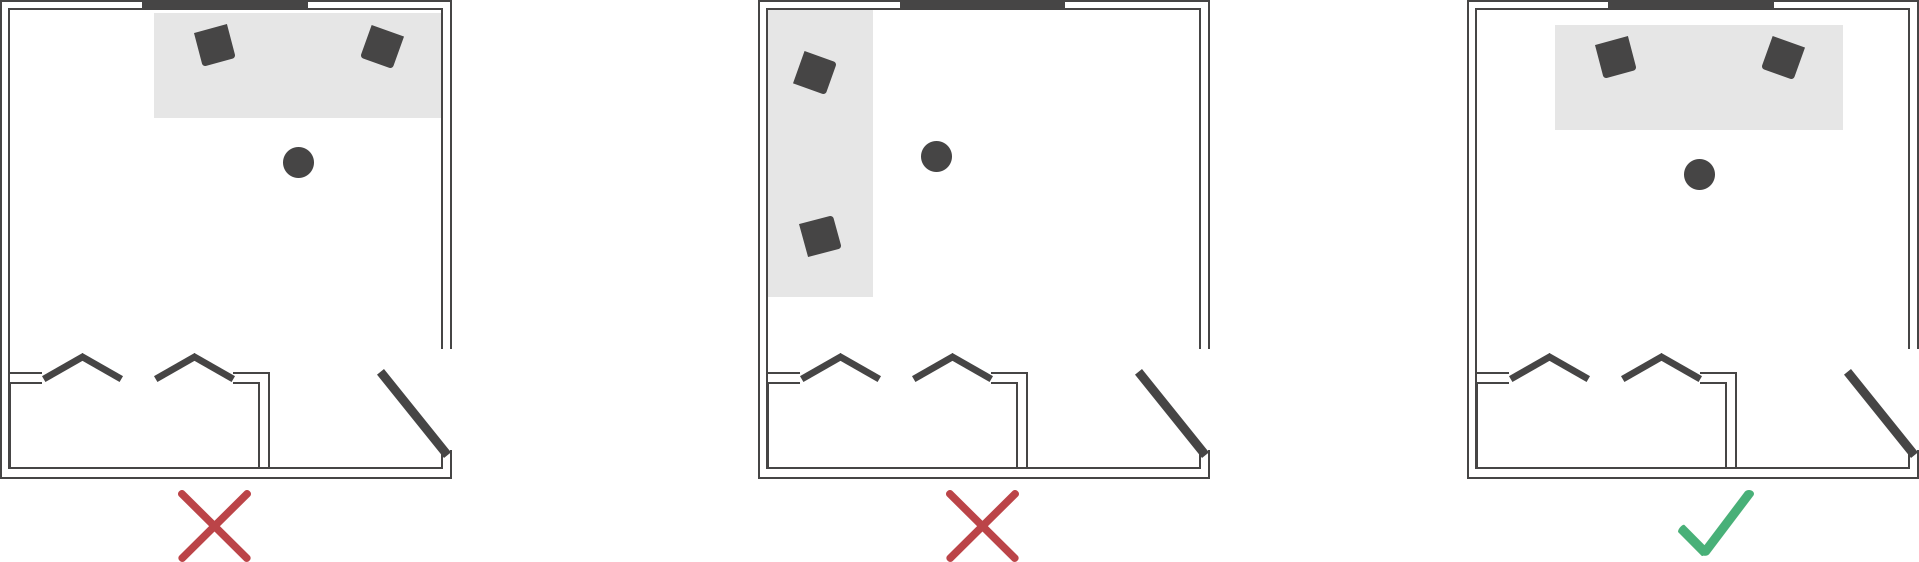
The first thing to do is read the technical guide for your model of reference monitor. It will indicate where, how and at what distance from the walls the manufacturer advises to position the equipment. Depending on the size of your room, distances may vary and have a major impact on your reference. Then, figure out if your environment allows you to respect the recommended distances. If your room does not allow it, ask yourself the following questions : What direction is the closest to ideal? Can I restrict access to a closet or window to optimize the positioning of my equipment? Sometimes, the compromise may be worth it.
Acoustics
Obviously, even if your positioning is optimized, your reference will be unbalanced by the acoustics of your room if it is not minimally processed. There are various ways to process and control sound reflection, like absorption, reflection, bass trap, etc. But, what should you use and where? Before trying to do too much, start with the logical stuff. First, eliminate the sound reflections that are most likely going to affect your listening. On the walls and the ceiling, identify the points of impact of the first reflections that reach your ears.
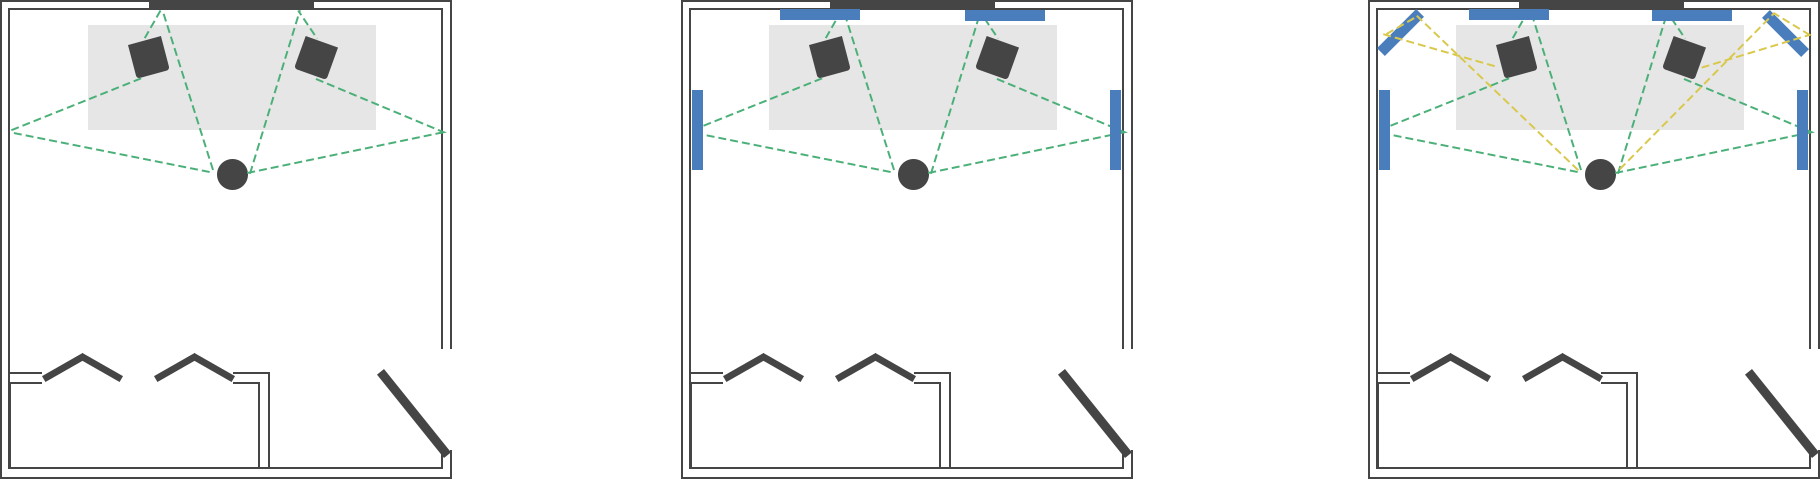
In these places, put absorbent panels and do tests. You will immediately hear a difference. Then do the frequency analysis of your listening point with an RTA but also with your hearing. First, use your monitors ''room control'' to correct problematic frequency areas. Bear in mind that only you will have to compensate for the imbalances. Do a lot of listening and learn to recognize the imbalances by comparing your mix to a reference piece that you find perfectly balanced. The quality and uniformity of a mix does not only depend on the quality of the monitors, but also on the knowledge of its reference environment, even if it is not perfect. Here is a tool to help you with the positioning process. http://noaudiophile.com/speakercalc/.